In this post im going to describe one of the most useful ways to deploy page layouts. One of the most interesting features in the world of the Sharepoint branding is the possibility to create differents page layouts and apply this page layouts to different pages on a sharepoint site
Page Layouts and Masterpages
First of all is necessary to understand that a page layout and a masterpage are different things, a masterpage is basically the way to apply a different branding (images, colors, background, menus) to a entire site, a page layout is the distribution of sections in a particular publishing page, Sharepoint by default create a couple of page layouts for all new sites as we can see in figure 1, but if you are a serious sharepoint dev there will be a moment when you will need to create a custom page layout to give to your page sites a particular distribution.
fig 1.
Steps to Create a Page Layout Feature Installer
For this post im going to focus in the creation of the feature to deploy the page layout not in the creation of the page layout because of that is the work of the designer but you can see a good step by step: http://blog.henryong.com/2010/06/08/how-to-create-custom-sharepoint-2010-page-layouts-using-sharepoint-designer-2010/.
1. Creating visual studio project
fig 2.
2. Adding the new feature
Right click in the feature folder and click on new Feature, the new feature should be created at web scope like.
fig 3.
3. Adding the new module
Modules in Sharepoint are the objects that let us to upload files to differents locations in sharepoint like images to document libraries or files to a particular folder in the Sharepoint hive, so we are going to create a new module to upload the page layout to the masterpages gallery, to add the module to the project right click in the project, add new item and select the module item, after add the item to the project it should looks like fig 4.
fig 4.
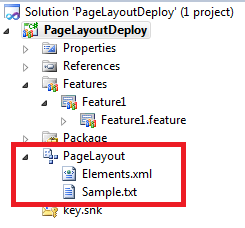
The new module by default add a new file called sample.txt, we remove that file.
4. Configuring module
The first thing to do with the module is to add the pagelayout file, to do this right click on the module icon an select add existing item, select the pagelayout file to deploy, module should looks like fig 5, in this case my pagelayout is the home.aspx file.
fig 5.
After added the pagelayout file we need to edit the element.xml in the module object, this is the key of the process its a little tricky because of for a page layout module is necessary to define a couple of special properties to get a correct deployment in the gallery, figure 6 show how should be write the content of the xml file
fig 6.
The property with the commas and the sharp is a field that should be filled in that way to tell to the module that the contenttype associated with that masterpage is the Welcome Page the GUID in the field value is the conttype id of the Welcome Page contenttype, it could be possible to use one of the default conttypes in sharepoint but if we need to create pages based in a custom contenttype we could reference our custom contenttype in that field.
5. Deploy the feature
At this point we can deploy the feature and after the deploy if we go to the MasterPage gallery our new page layout should be visible and if we create a new publishing page our new page layout should appear in the list of available pages layouts in the site.
I hope this post will be useful..


